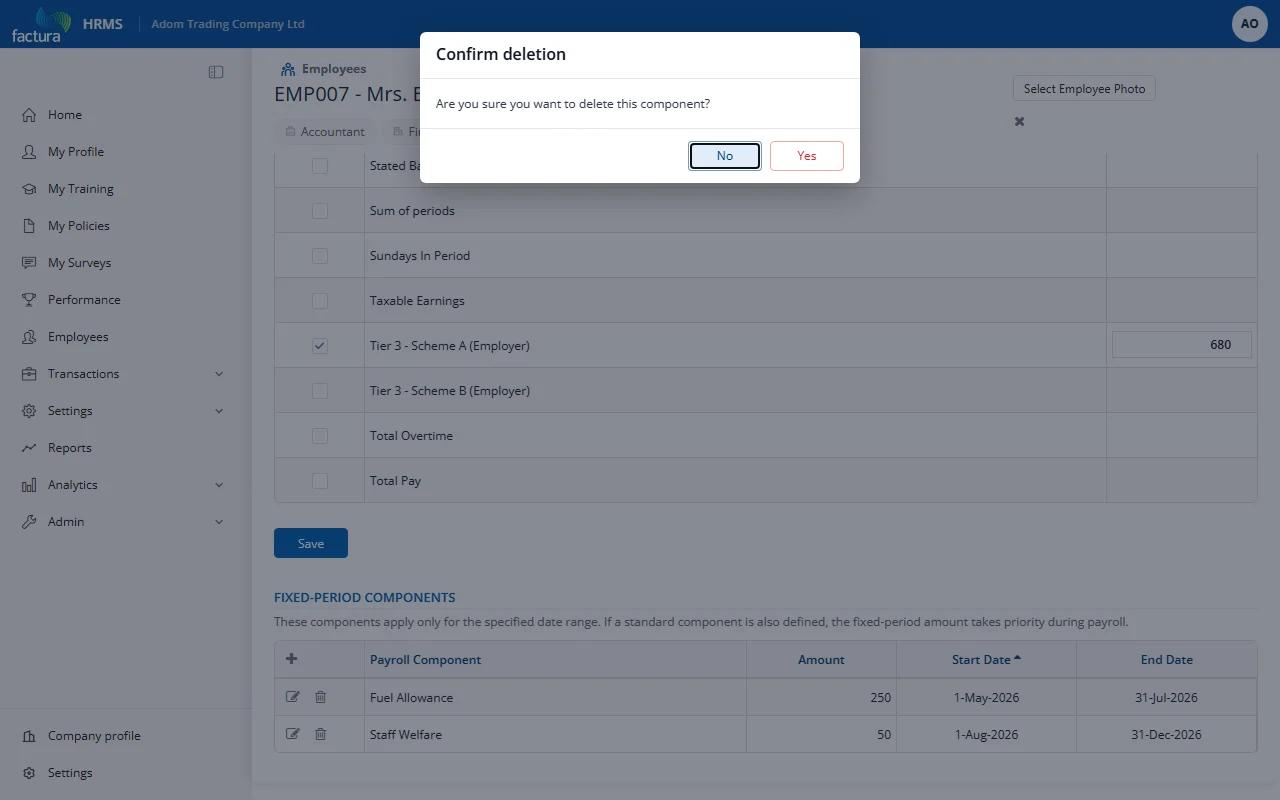
How do I set up fixed-period components?
Fixed-period components have a specific start and end date. They are automatically included in payroll only during the specified date range.
Layout
The fixed-period table has five columns:
| Column | Description | Sortable |
|---|---|---|
| Actions | Add (+), Edit, Delete buttons | No |
| Payroll Component | The component name | Yes |
| Amount | The component value | Yes |
| Start Date | When the component begins | Yes (default) |
| End Date | When the component expires | Yes |
Click any sortable column header to toggle between ascending and descending order. An arrow icon indicates the active sort direction.
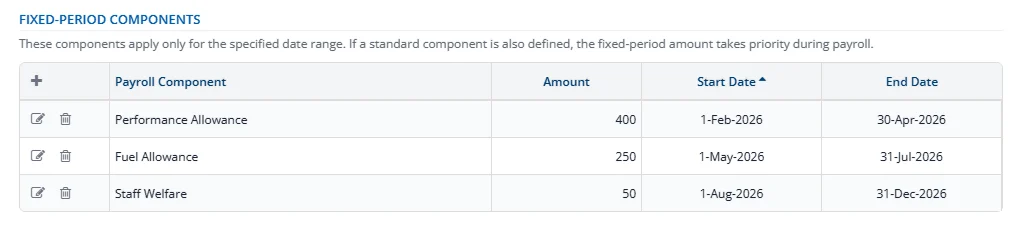
How to Add a Fixed-Period Component
- Click the + (plus) icon in the table header
- An inline form row will appear at the top of the table
- Select the Payroll Component from the dropdown
- Enter the Amount
- Pick the Start Date and End Date
- Click the save (floppy disk) icon to save, or X to cancel
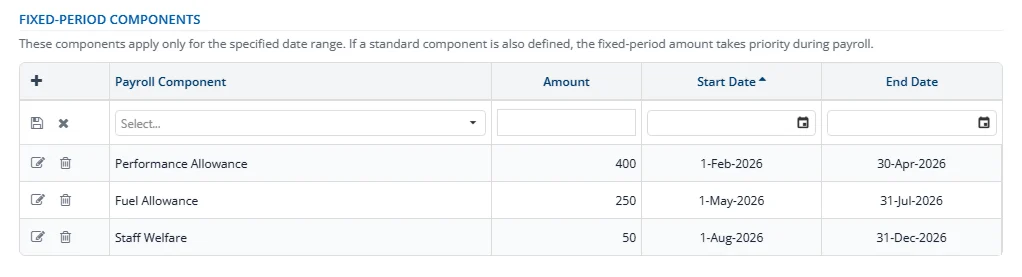
How to Edit a Fixed-Period Component
- Click the pencil icon on the row you want to edit
- The row switches to edit mode — you can change the Amount, Start Date, and End Date
- The component name cannot be changed (delete and re-add if needed)
- Click the save (floppy disk) icon to save, or X to cancel
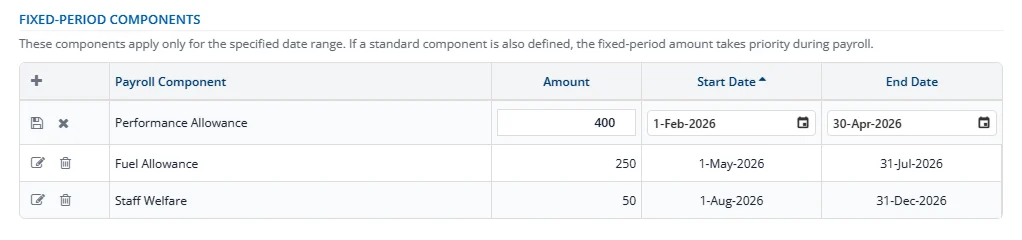
How to Delete a Fixed-Period Component
- Click the trash icon on the row you want to delete
- A confirmation dialog will appear
- Click Yes to confirm deletion