
How does clearance work for a leaver?
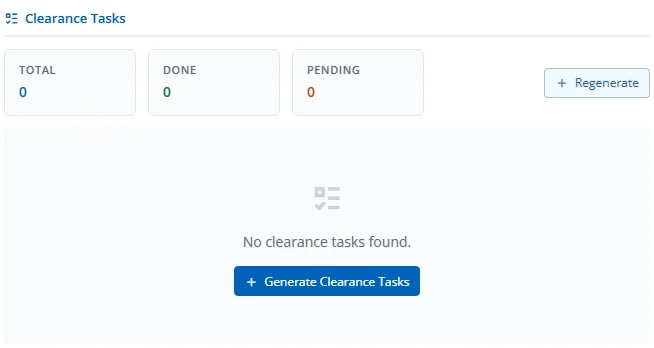
The CLEARANCE section appears in the workspace once the separation reaches In Progress (Status >= 2). It is the checklist of everything the company must recover or settle before the employee leaves — assets, money, documents, and handover. The Completion Steps sidebar tracks its state (Done / Pending / Locked).
How clearance fits in the lifecycle
In Progress (2) --Generate Clearance Tasks--> Pending Clearance (3) --Mark Clearance Complete--> Pending Final Pay (4)
- Clearance cannot start until the separation is approved (In Progress or later).
- Generating tasks moves the separation from In Progress to Pending Clearance.
- You cannot reach Pending Final Pay until every task is complete, or you explicitly Skip Clearance.
Generating clearance tasks
Click Generate Clearance Tasks (in the action bar or on the empty-state card). This:
- Creates a parent task "Separation Clearance —
" . - Adds the standard clearance activities below as subtasks.
- Adds a Return Property task for every company asset still issued to the employee (see 8.3).
- Sets every task's due date to the Last Working Date.
- Advances the separation to Pending Clearance.
Auto-generation: If Auto-Generate Clearance is enabled in module Settings, these tasks are created automatically the moment the separation is approved — you skip the manual button. The setting is honoured only when a clearance template exists for the company.
Standard clearance activities
The standard checklist comes from the company's "Separation Clearance" task template. Out of the box it contains five activities:
| # | Activity | What it covers | Owner |
|---|---|---|---|
| 1 | IT Equipment Return | Collect laptop, phone, access cards, and other IT equipment. | IT |
| 2 | Finance Clearance | Verify all advances settled, expense claims resolved, and financial obligations cleared. | Finance |
| 3 | HR Exit Documents | Process exit documents, employment certificate, and benefits paperwork. | HR |
| 4 | Facilities / Access Cards | Collect office keys, parking passes, and revoke building access. | Facilities |
| 5 | Line Manager Handover | Ensure work handover is complete, documentation transferred, and pending items reassigned. | Line Manager |
Customising the list: The template is per-company. An administrator seeds the default five via the module setup (
POST /seed-default-template), after which the list can be edited in the Task Management module — add, remove, rename, or reorder activities. Changes apply to separations generated after the edit; already-generated tasks are not retroactively changed.
Behind the scenes the system also creates four department sign-off gates (Manager · IT · Finance · HR) per separation for audit tracking. These are recorded automatically and do not require separate data entry in the edit form.
Automatic property-return tasks
In addition to the standard activities, the system inspects the employee's assigned company property. For every item flagged "to be returned on termination" that has no return date recorded, it adds a dedicated task:
Return Property:
— Collect property, with the item's original cost and replacement cost shown in the description.
This ensures issued assets (vehicles, tools, devices, SIM cards, etc.) are explicitly accounted for during exit, not just lumped under "IT Equipment Return."
Working the clearance tasks
Each clearance activity is a real task in the Task Management module — it is not completed inside the separation form. The clearance table here is a live mirror.
For each task the row shows:
- Subject — the activity name
- Due date — defaults to the Last Working Date; the row turns Overdue (with a day count) once that date passes
- Assignee — the person responsible, or Unassigned
- Status badge — Pending · Done · Overdue · Cancelled
Click a row to expand it for the full description and assignee list, plus an Open in Tasks link that jumps to the task in the Task Management module. There you assign an owner and mark the work done.
A task is treated as Done only when it has at least one assignee and all its assignments are marked complete.
Important — unassigned tasks block completion. A clearance task with no assignee counts as pending, not done. You cannot mark clearance complete until every non-cancelled task has an owner and that owner has completed it.
Clearance summary cards
The header cards roll up the table:
- Total — clearance tasks generated
- Done — tasks fully completed
- Pending — tasks not yet complete (includes unassigned tasks)
- Overdue — incomplete tasks past their due date
A progress bar shows Done ÷ Total, and the Pending Clearance CTA banner echoes "X of Y clearance tasks complete" with an overdue pill when applicable.
Completing or skipping clearance
- Mark Clearance Complete — appears only once all tasks are Done. It validates that no task is still pending (the request is rejected with the pending count if any remain) and advances the separation to Pending Final Pay.
- Skip Clearance — available from In Progress and Pending Clearance. Bypasses the remaining checklist and jumps straight to Pending Final Pay. Use this when assets were already recovered through another process (e.g. during a disciplinary action). The skip is recorded in the activity timeline.
Cancelling during clearance: Whether a separation can still be cancelled after clearance has started is governed by the Allow Cancel After Clearance module setting. When cancellation is allowed, any pending clearance tasks are cancelled with it (reassignments are not reversed — see Section 7).