
How do I approve or reject a loan request?
When you are assigned as an approver, pending loan requests appear on your dashboard and in the loan request list.
Dashboard - Pending Loan Approvals
The Pending Approvals section on the dashboard has one tab per type of request, each with a count badge (Expenses, Leave, Loans, Data Changes, Training, Disciplinary and Payroll Exceptions). Open the Loans tab:
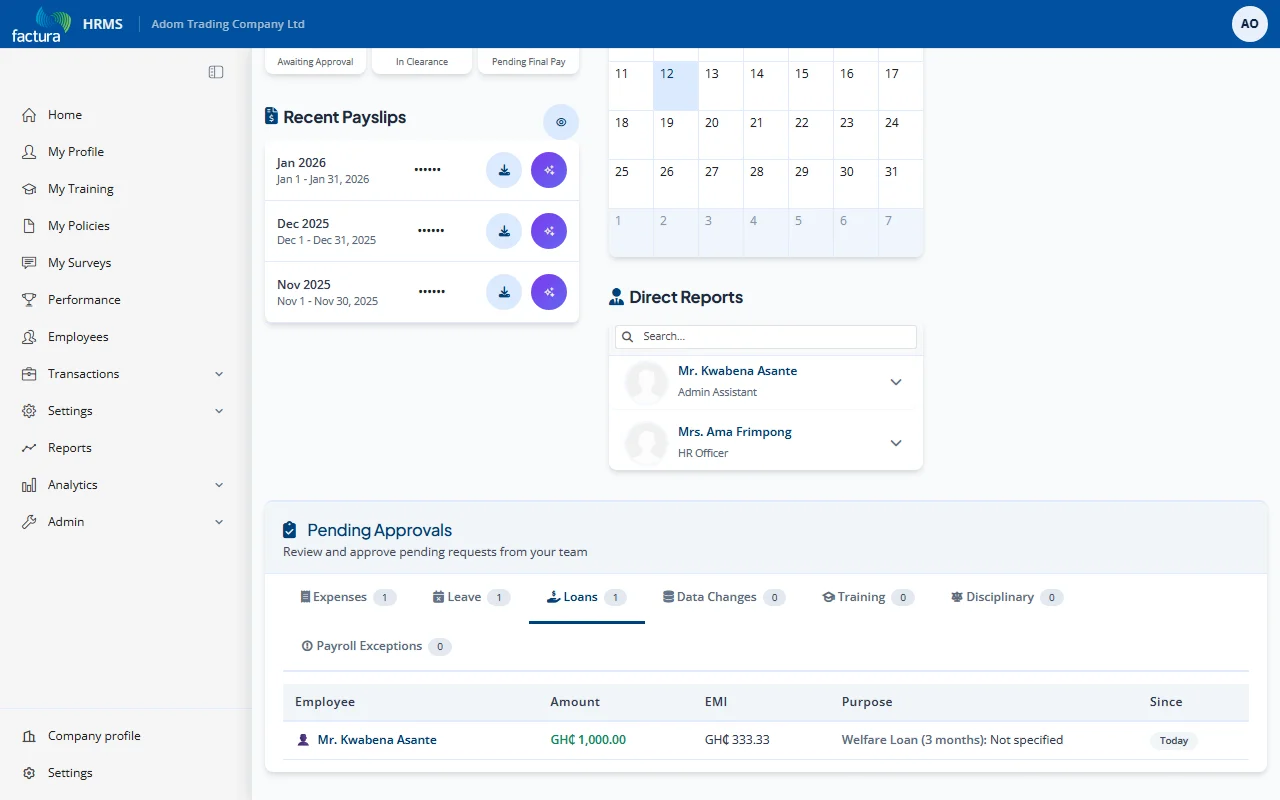
Each pending loan shows:
| Column | Description |
|---|---|
| Employee | Name of the employee who submitted the request |
| Amount | The principal loan amount requested |
| EMI | Equated Monthly Installment -- the monthly repayment amount |
| Purpose | Loan type, installment count, and description |
| Since | How many days the request has been pending |
Reviewing and Deciding
Click on a pending loan to open the full request detail. Scroll down to the Approve / Reject section, which is shown only to the current approver:
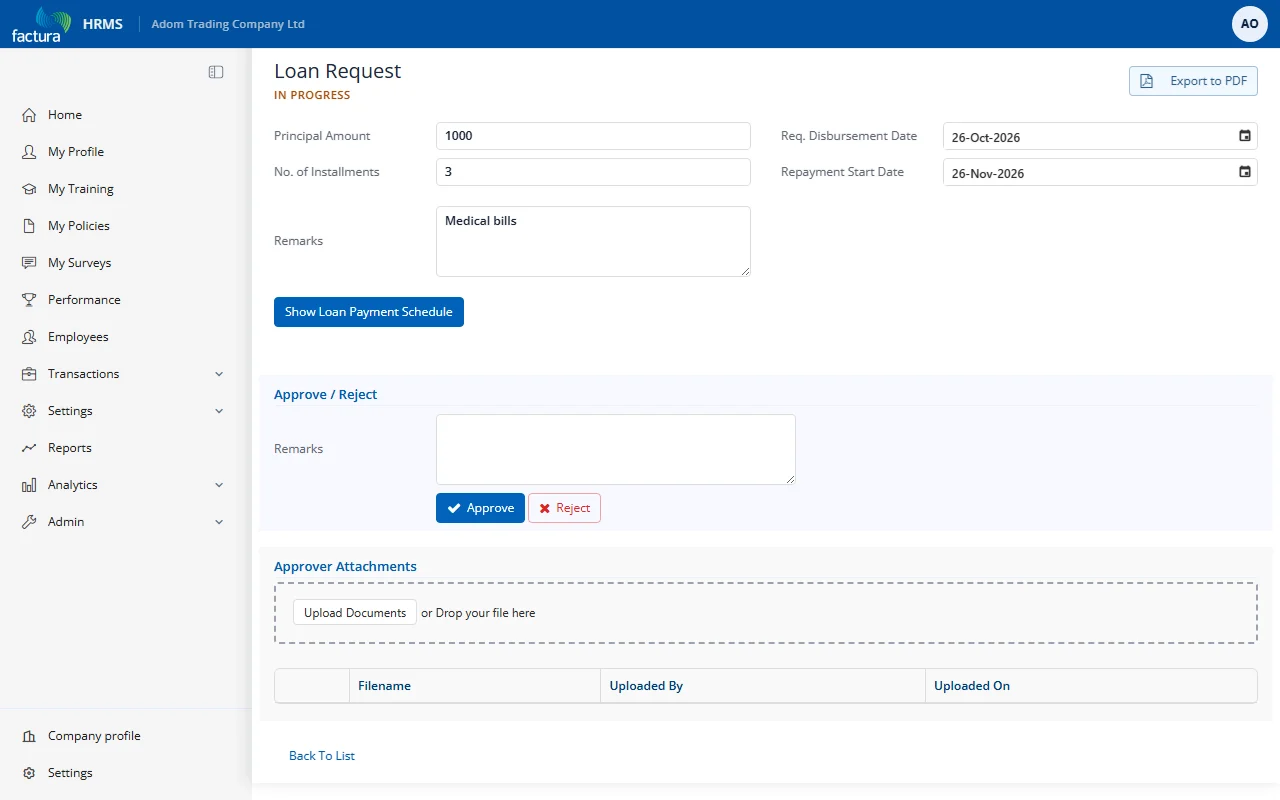
- Review the loan details: employee, loan type, principal amount, installments, disbursement date, and repayment start date.
- Click Show Loan Payment Schedule to review the full repayment plan.
- (Optional) Enter Remarks -- comments explaining your decision.
- Choose an action:
| Action | Button | What Happens |
|---|---|---|
| Approve | Blue button with checkmark | If more approval levels exist, the request advances to the next level. If this is the final level, the request is marked as Approved. |
| Reject | Red outlined button with X | The workflow is immediately terminated. The request is marked as Rejected. The requestor is notified with your rejection remarks. |
Below the decision buttons, the Approver Attachments section lets you upload your own supporting files by clicking Upload Documents or dropping a file there.