
How do I approve or reject an expense request?
When you are assigned as an approver, pending expense requests appear on your dashboard and in the expense request list. The Pending Approvals panel on the dashboard has a tab for each type of request (for example Expenses, Training, Disciplinary and Payroll Exceptions).
Dashboard - Pending Expense Approvals
The Pending Approvals section on the dashboard includes an Expenses tab with a count badge. Each pending item shows the employee name, amount, purpose (expense type and description), and how long it has been pending.
Reviewing and Deciding
Click on a pending expense to open the full request detail. Review:
- Employee name and description
- Workflow progress bar showing your position in the approval chain
- AI Insights (button near the top) for an AI-generated review of the claim
- Expense Details grid with all line items (type, dates, amounts, payment method, remarks)
- Supporting Documents (receipts, invoices)
Scroll down to the Approve / Reject section. It is shown only to the current approver; other people who open the request do not see it:
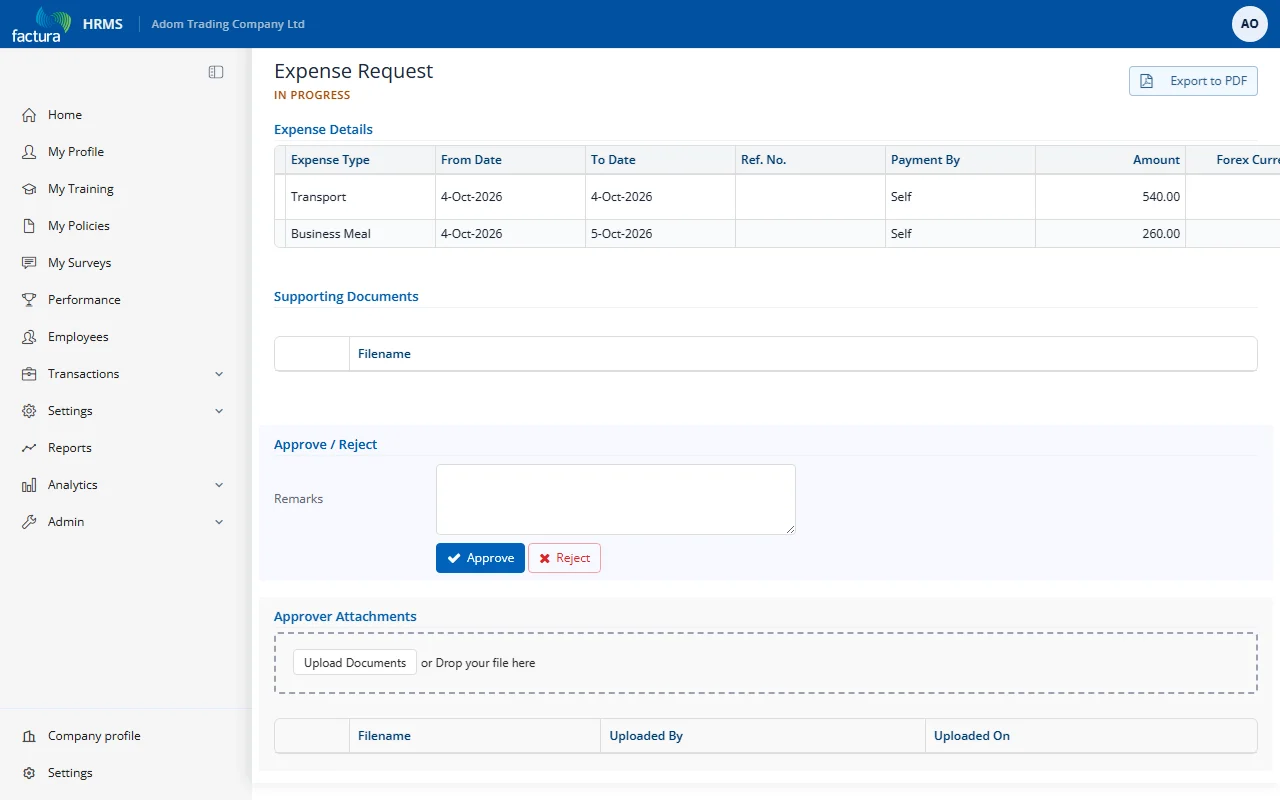
- Review all line items and supporting documents.
- (Optional) Enter Remarks -- comments explaining your decision.
- Choose an action:
| Action | Button | What Happens |
|---|---|---|
| Approve | Blue button with checkmark | If more approval levels exist, the request advances to the next level. If this is the final level, the request is marked as Approved. |
| Reject | Red outlined button with X | The workflow is immediately terminated. The request is marked as Rejected. The requestor is notified with your rejection remarks. |
Below the decision buttons, the Approver Attachments section lets you upload your own supporting files (for example a confirmation or a reviewed quote) by clicking Upload Documents or dropping a file there. These are listed with who uploaded them and when.